This guide will help you create custom GPT assistants that interact with your Obsidian vault using the Smart Connect plugin. With the latest update (version 1.3.11), you can now create multiple Custom GPTs, each tailored to specific workflows or tasks.
Preparation:
- Obsidian & Smart Connect: Ensure you have Obsidian and the Smart Connect plugin installed and set up.
- ChatGPT Account: Creating Custom GPTs requires a ChatGPT Plus subscription.
Creating Your Custom GPT Assistant
1. Access GPTs in ChatGPT
- On ChatGPT, navigate to the “GPTs” section.
- Click “Create” to start a new Custom GPT.
- Give your GPT a name and description (e.g., “Obsidian Assistant”).
2. Optional Conversation Starters
- Add example prompts to guide your GPT’s understanding of your needs.
Connecting to Smart Connect
1. Create a New Custom GPT in Smart Connect
-
Open the Smart Connect app.
-
Navigate to the “Smart Actions” section.
-
Under “Custom GPTs”, click the “New Custom GPT” button.
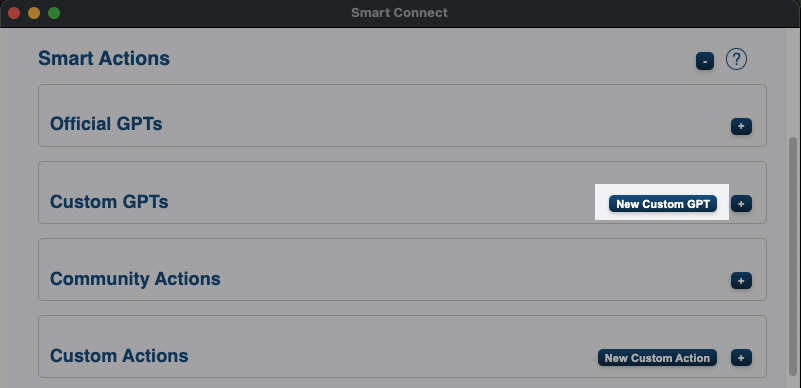
-
A new GPT will appear in the list (e.g., “Custom 1”).
-
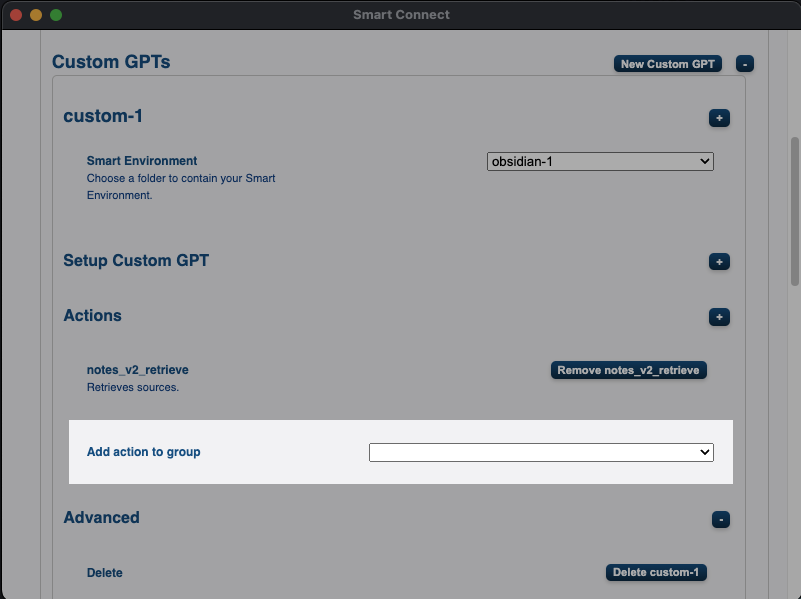
Rename your GPT for clarity by clicking on its name and typing a new one (e.g., “Notes Management GPT”).
2. Limit Available Actions (Recommended)
-
Limiting actions helps the GPT focus on specific tasks, improving performance and reducing confusion.
-
Under your Custom GPT settings, find the “Available Actions” section.
-
Click the dropdown and select the specific actions you want your GPT to use (e.g., “Create Note”, “Append to Note”).
3. Set Up Authentication
API Key Setup
-
In the Smart Connect app, go to “Settings”.
-
Under “Global Settings”, locate your API Key.
-
Copy the API Key (keep it secure!).
-
In your Custom GPT settings, under “Authentication”, select “API Key” and “Bearer”.
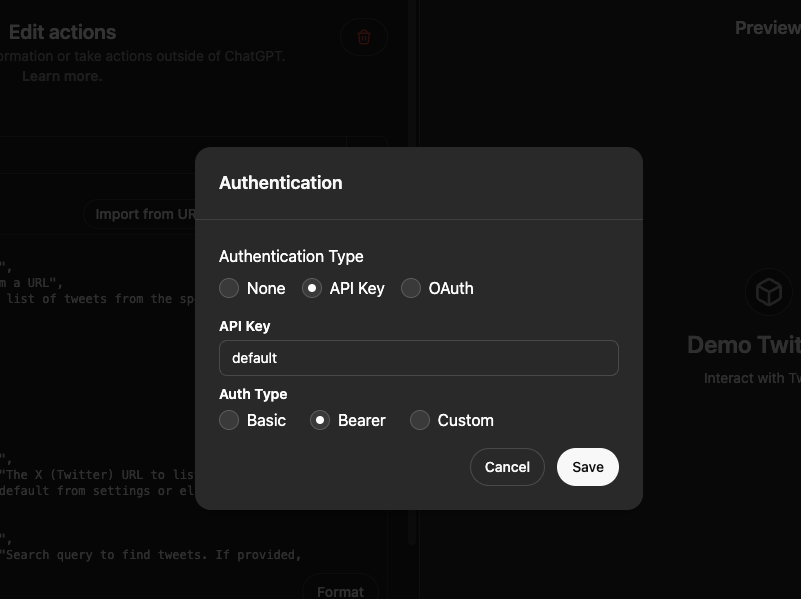
-
Paste the API Key into the designated field.
Bearer Token (if required)
- For actions that interact with external services like Twitter, you may need to input a Bearer Token.
- Obtain the Bearer Token from the respective service and input it in the “Authentication” section.
4. Configure OpenAPI URL
- In your Custom GPT settings, under “Setup Details”, locate the OpenAPI URL.

- Copy the OpenAPI URL.
5. Import Actions into ChatGPT
- In the ChatGPT Custom GPT editor, click “Add Actions”.
- Paste the OpenAPI URL into the “Enter Schema” or “Import from URL” field.
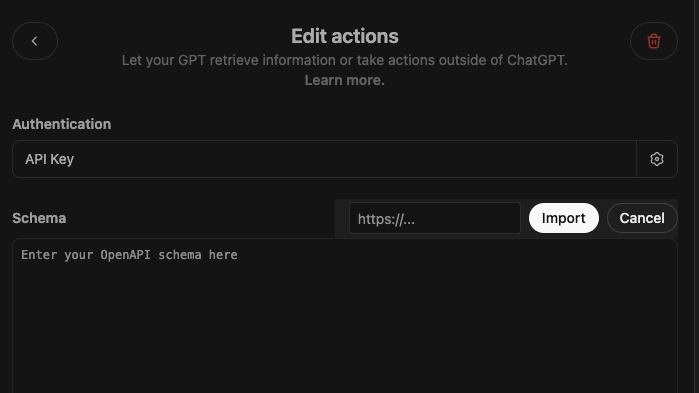
- Click “Import” to load the actions.
6. Finalize and Save
- Review the list of available actions and ensure they match those you’ve selected in Smart Connect.
- Save your Custom GPT configuration.
Managing Multiple Custom GPTs
- Creating Additional GPTs:
- Repeat the steps above to create more Custom GPTs tailored to different tasks.
- Renaming GPTs:
- Click on the GPT’s name in Smart Connect to rename it for better organization.
- Deleting GPTs:
- In the Smart Connect app, under “Custom GPTs”, click the Delete icon next to the GPT you wish to remove.
Start Exploring!
With your custom GPT connected to Obsidian, you can now:
- Create and manage notes using natural language commands.
- Search your vault effortlessly.
- Insert and append content to existing notes.
- Interact with external platforms (e.g., Twitter) using Custom Actions.
Remember, the possibilities are endless. Get creative and discover a new way to interact with your knowledge base!