Getting Started with Smart Connect

Workflows
Install/Enable Smart Connect
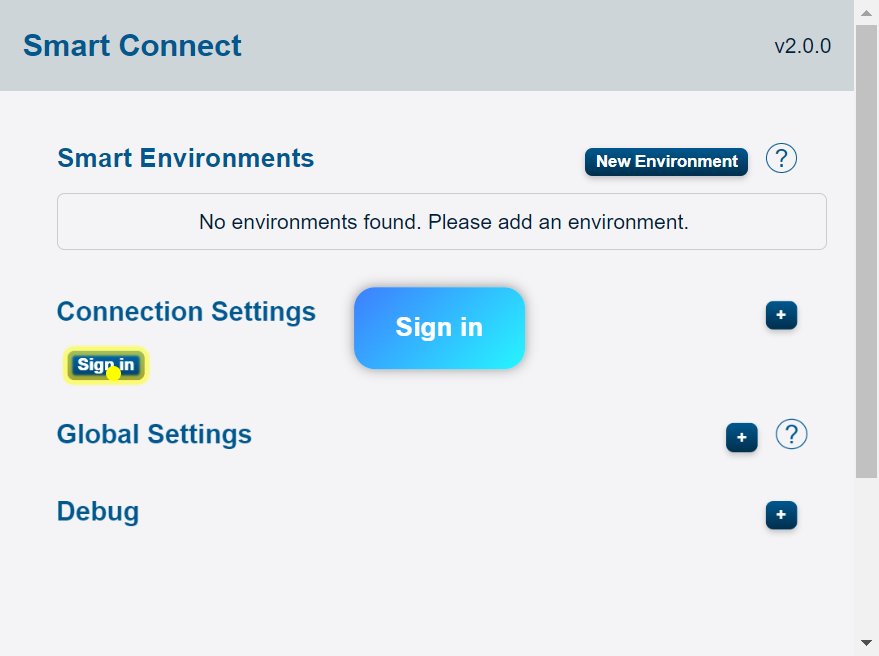
Enter your email and connection key in the sign-in prompt. Press ‘Sign in’ to proceed.
Below is a screenshot showing the sign-in prompt with fields for email and connection key:
After signing in, the main dashboard appears. A ‘Signed in’ status indicates a successful sign-in:
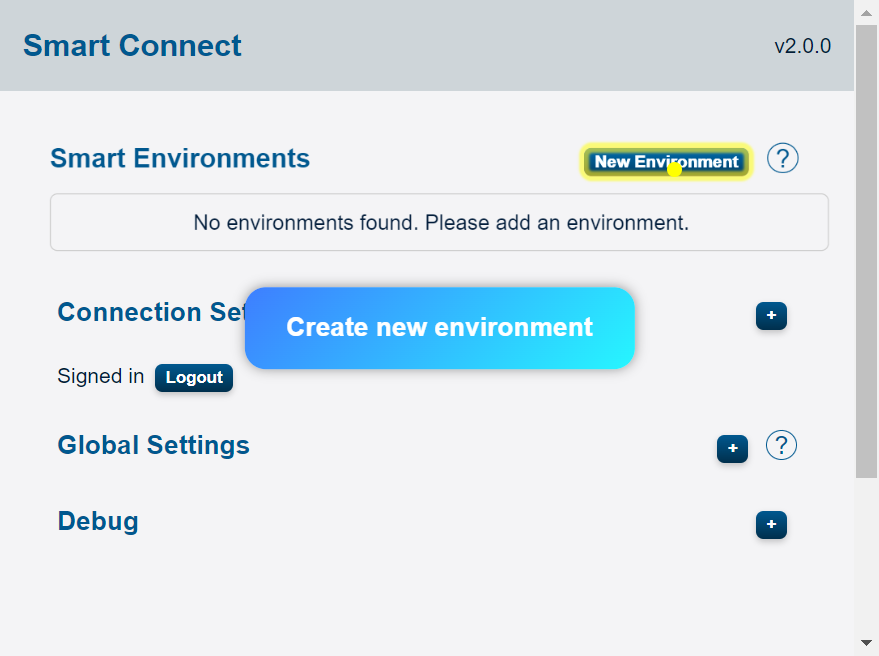
The main screen initially shows ‘No environments found. Please add an environment.‘
Create a New Environment
Step 1: Click ‘New Environment’
On the Smart Connect main screen, click ‘New Environment.’
Below is the screenshot showing the button:
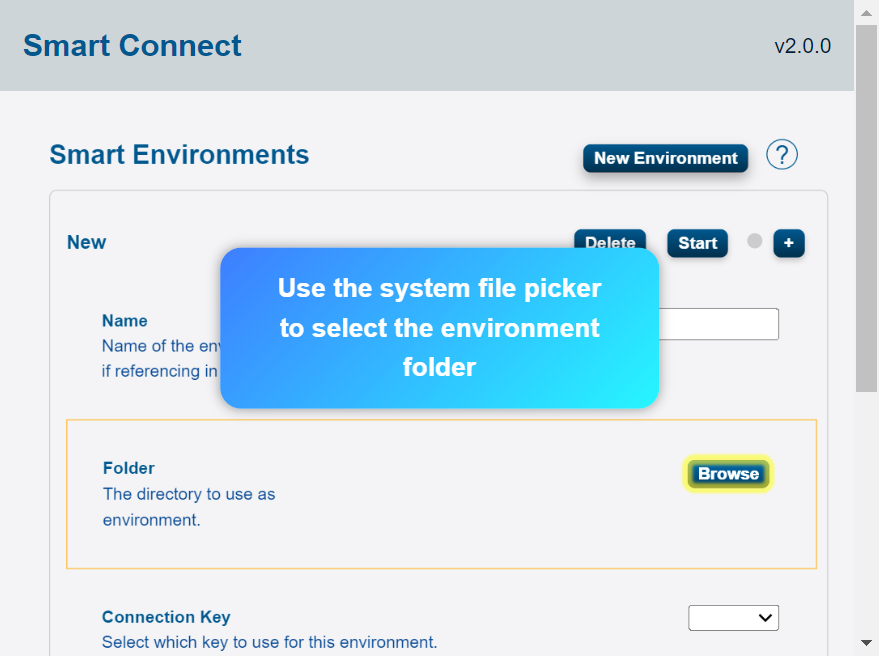
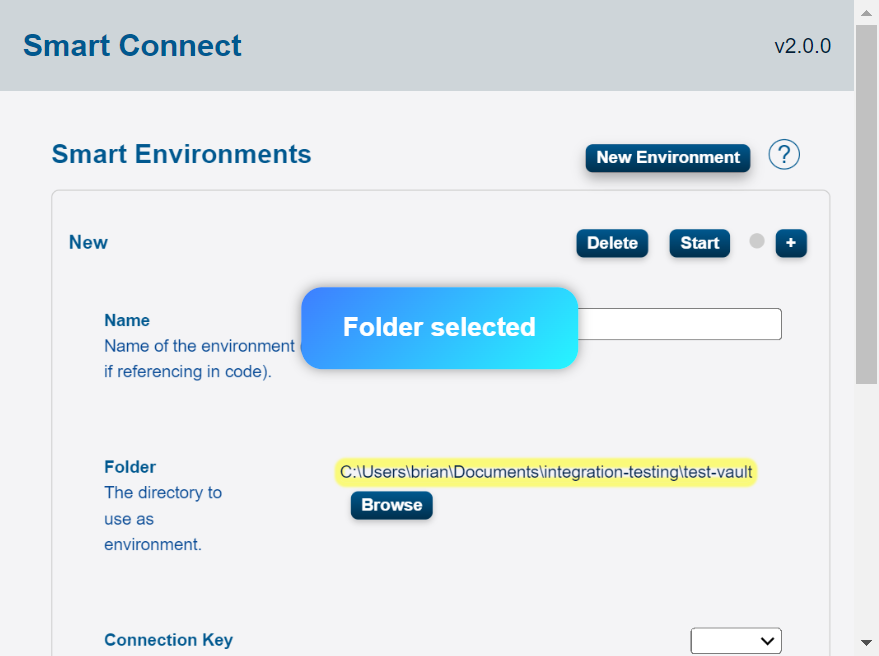
Step 2: Select Folder or Path
Use ‘Browse’ to select a local folder or a shared network path for notes. Confirm the selection when prompted.
Below are screenshots showing the folder selection step:
Step 3: Enter an Environment Name
In the ‘Name’ field, type a name for this environment (for example, ‘New’).

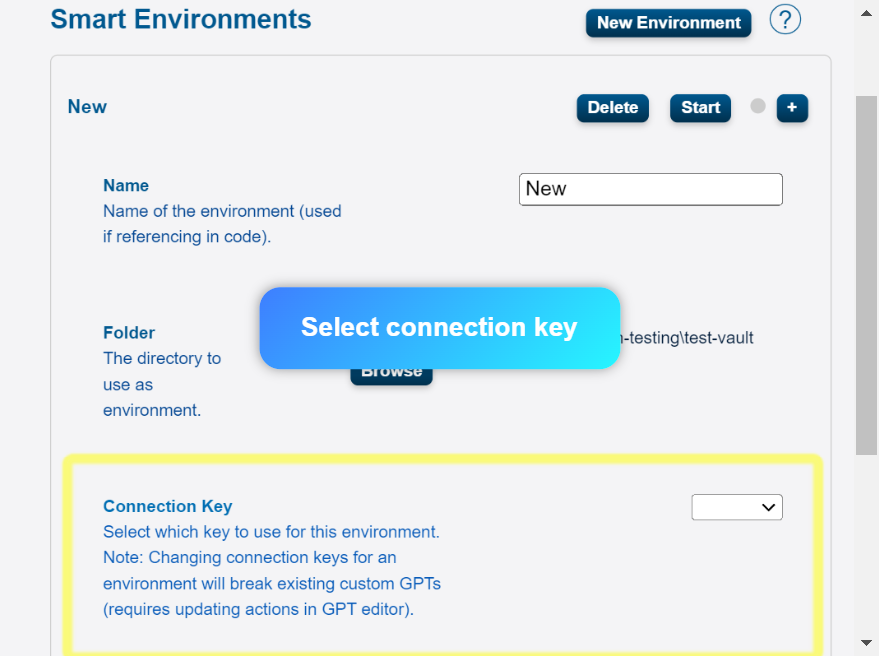
Step 4: Select a Connection Key
Use the ‘Connection Key’ dropdown to pick the key you want to associate with the new environment. Changing connection keys later will break existing custom GPTs for that environment.
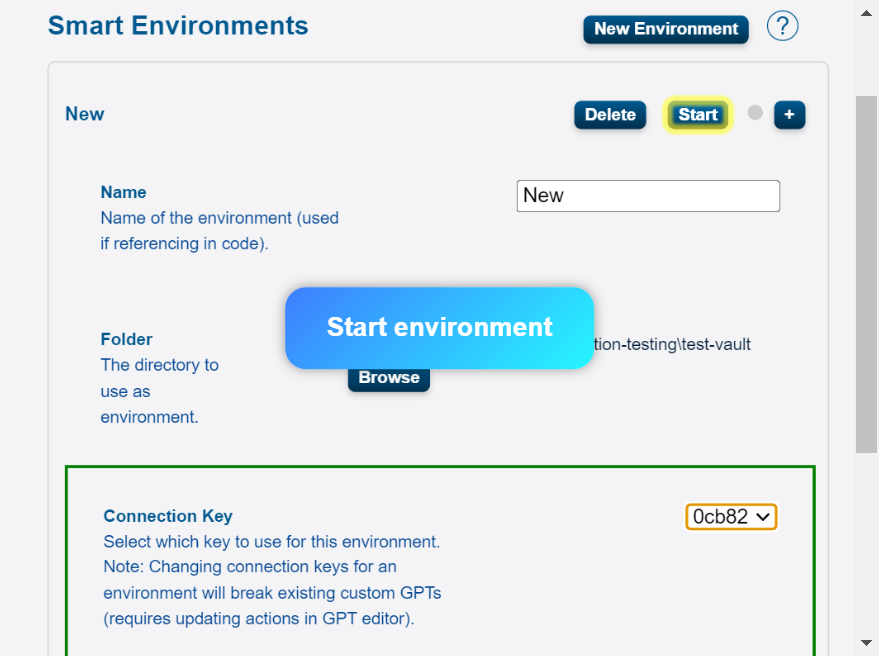
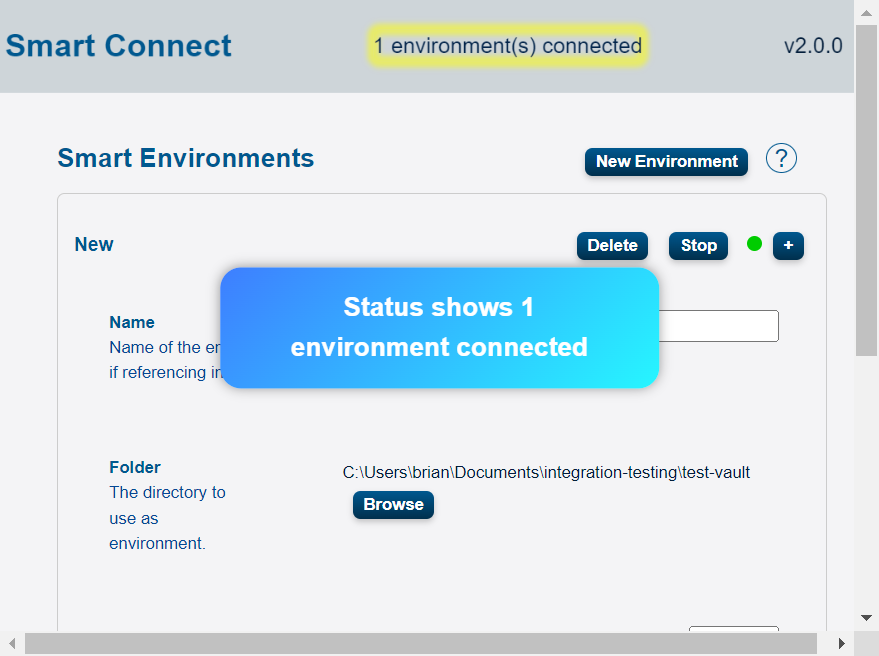
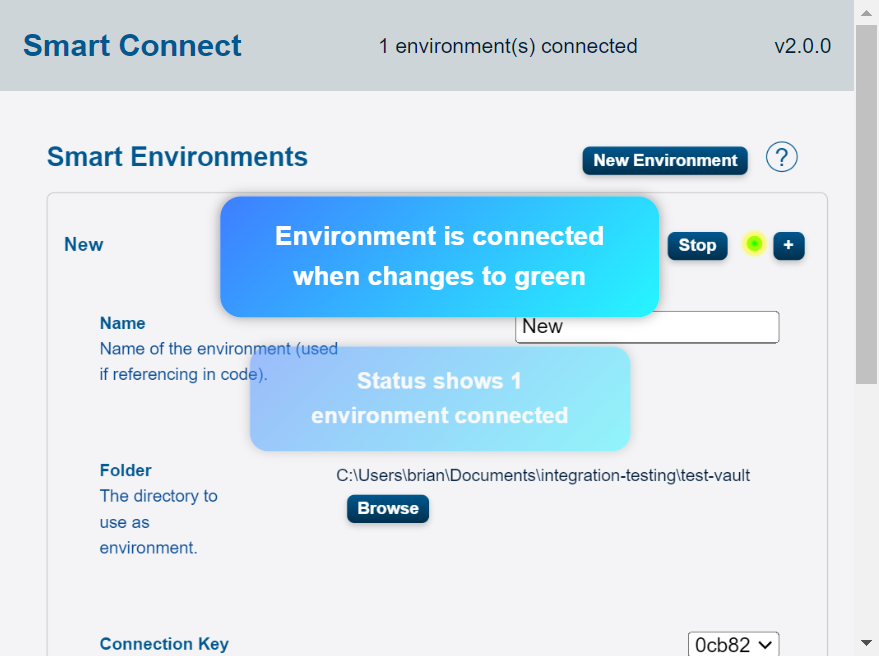
Step 5: Start the Environment
Press the ‘Start’ button. When the environment is connected, the indicator next to ‘Stop’ turns green and the top bar shows ‘1 environment(s) connected.’
Troubleshooting
Check Console Logs
If something isn’t syncing, use the ‘Open Console Logs’ button to open the console. Screenshot the logs and post an issue on Github.