Getting Started with Smart Connections
Purpose / Objective
Ready to supercharge your note-taking with minimal hassle? Dive into Smart Connections—your ticket to instant clarity. Trusted by thousands of note-takers, researchers, and PKM practitioners for easy cross-referencing and swift setup.
User Goal
Install and enable the plugin in just minutes, then confirm everything is running smoothly—no guesswork required.
Logline
Get from zero to fully operational in three easy steps. Join the 10K+ users already benefiting from quick and powerful note linking!
Real-World Use Case
Imagine you’ve discovered an exciting new Obsidian plugin and want to test it quickly—this guide ensures you’re up and running with minimal friction.
Workflows
Demo 1: Installing and Verifying Smart Connections
Step 1: Open a Fresh Vault
Open an Obsidian vault to begin the setup.
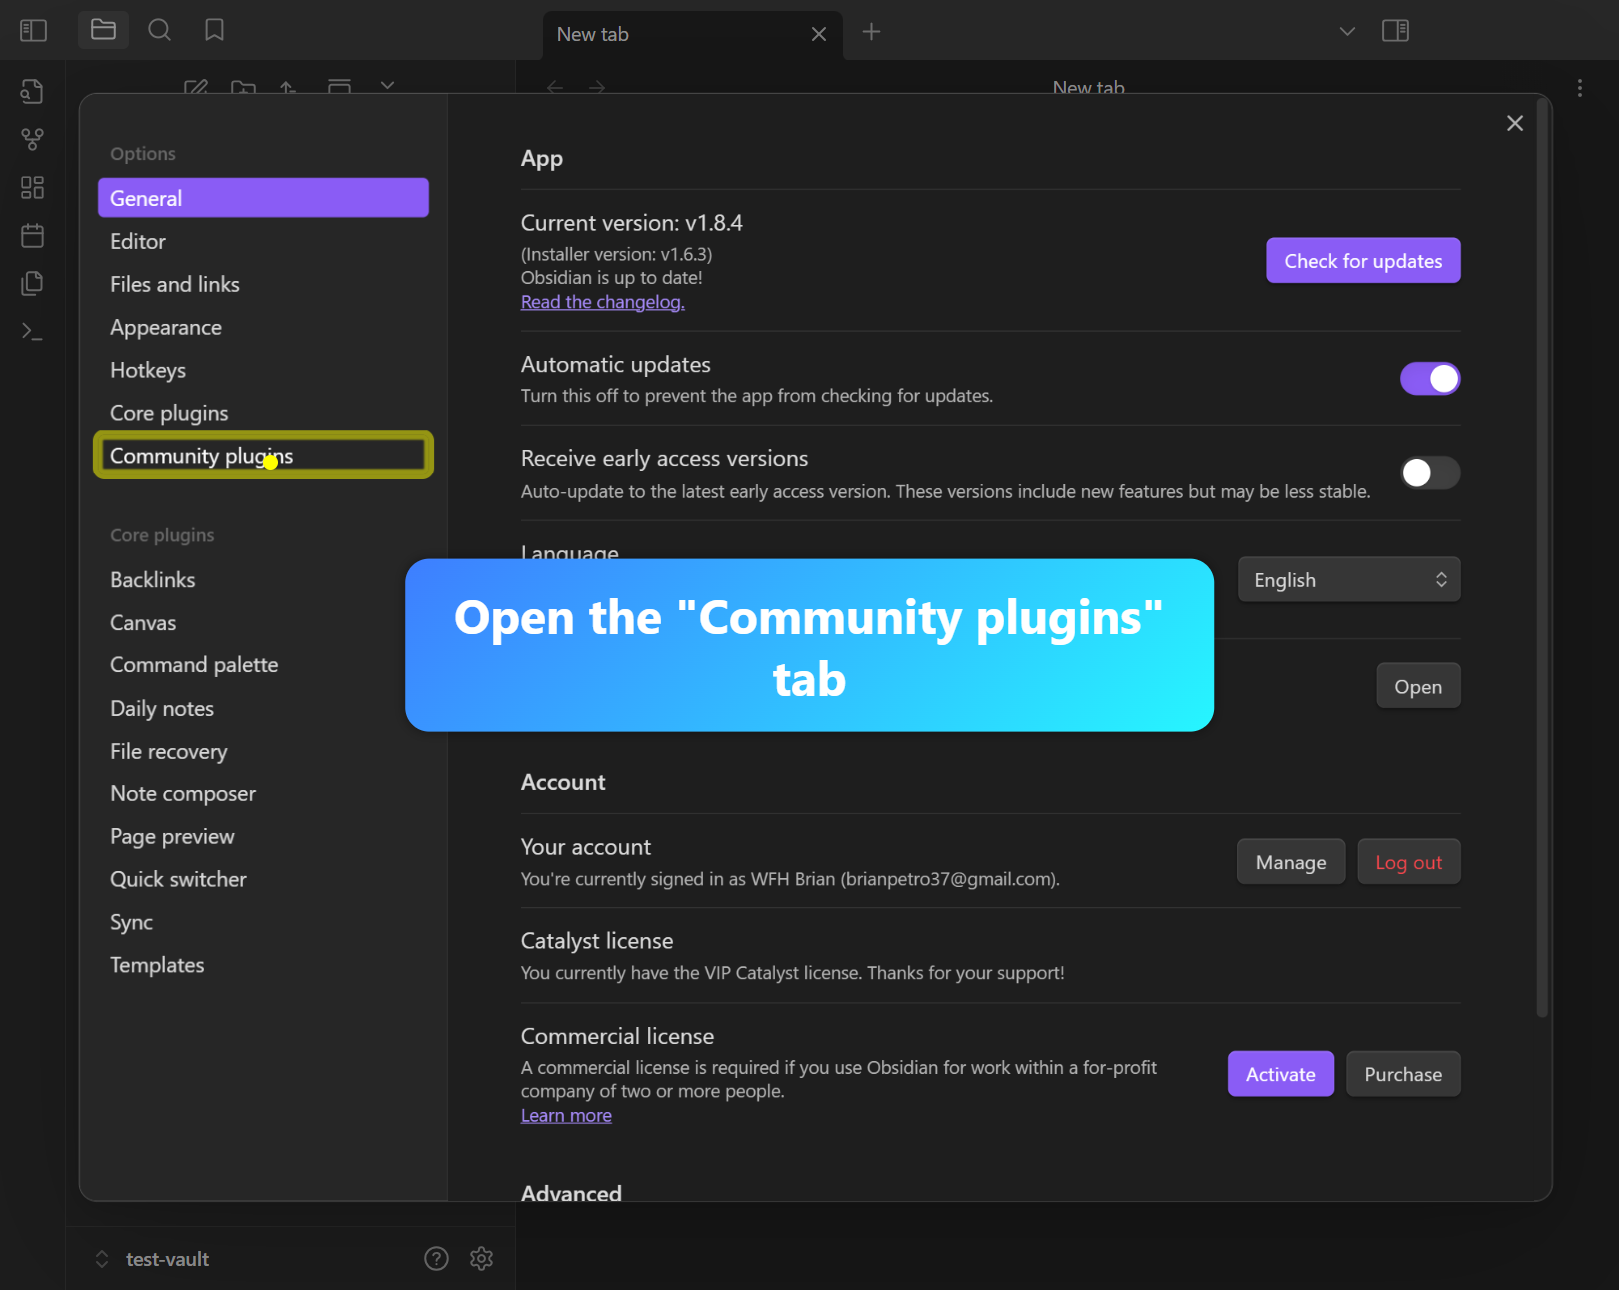
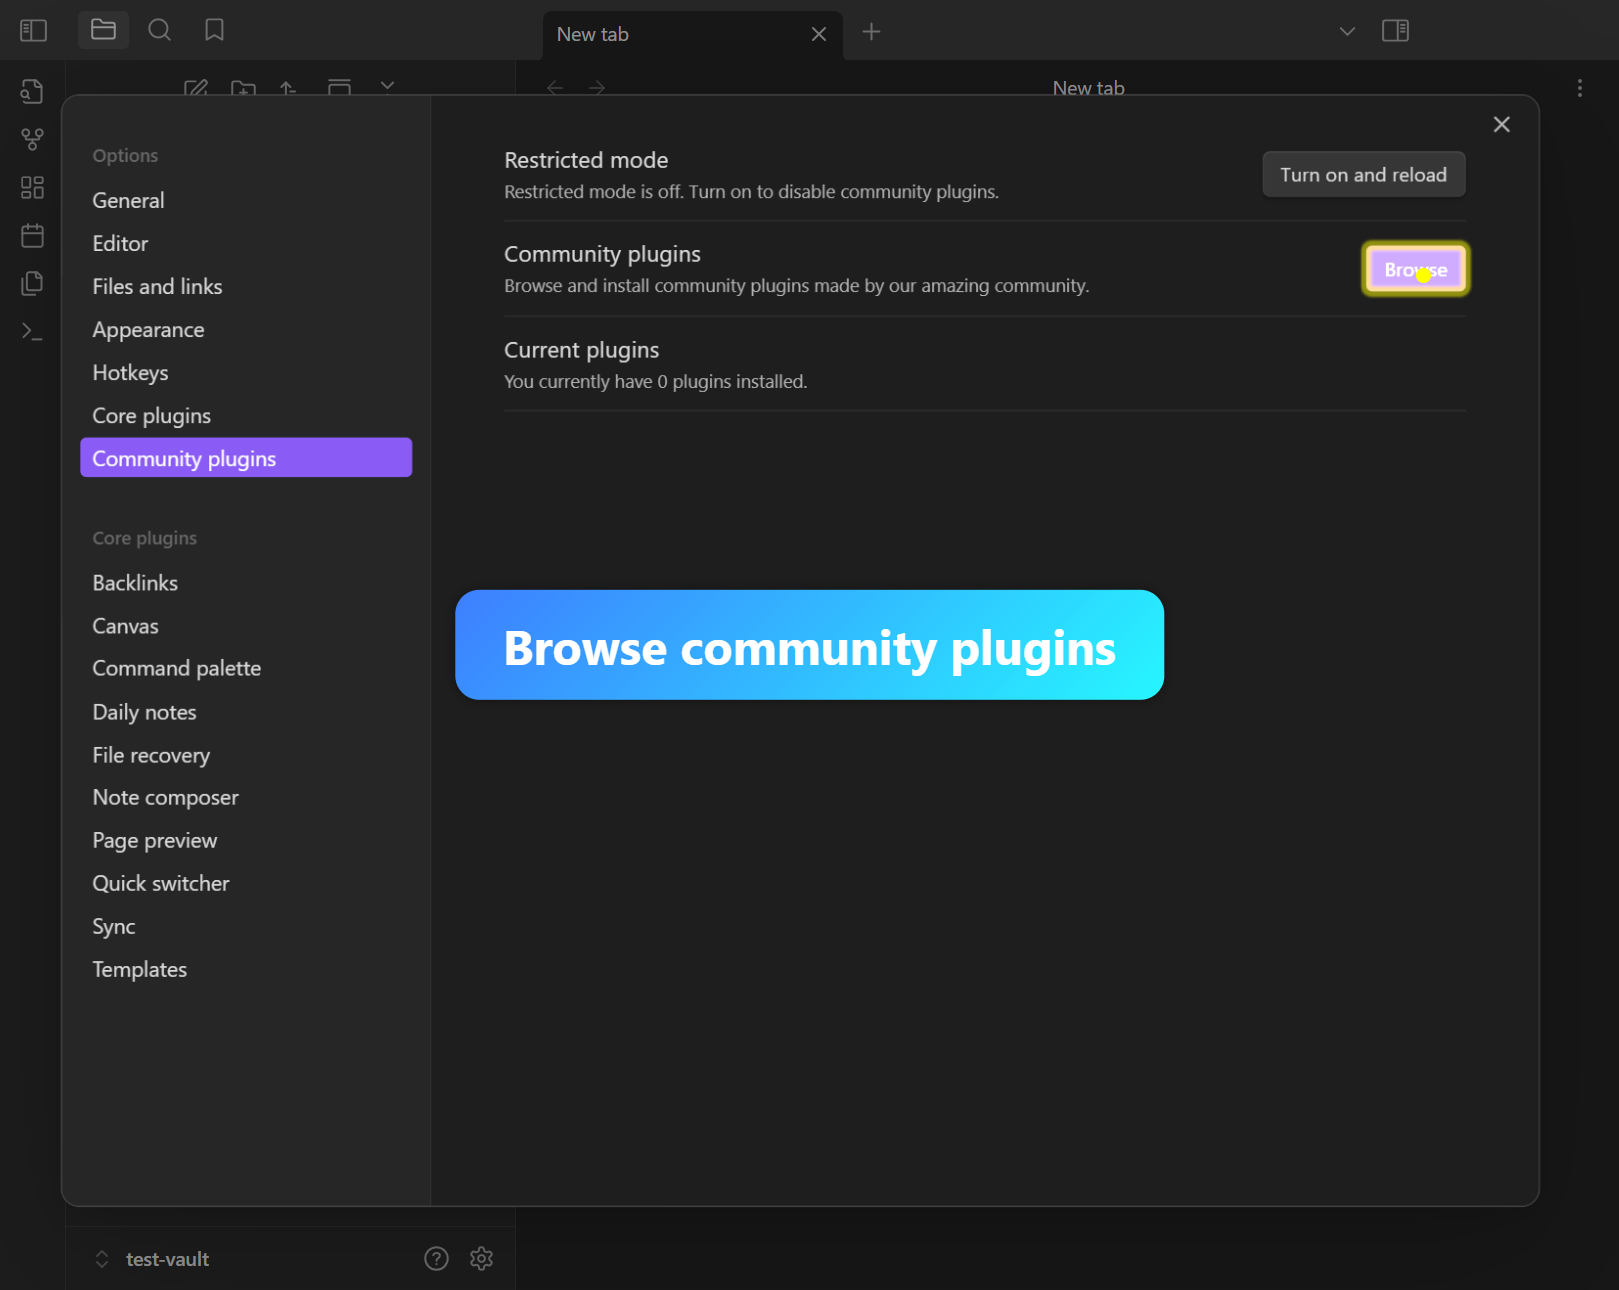
Step 2: Community Plugins → Search
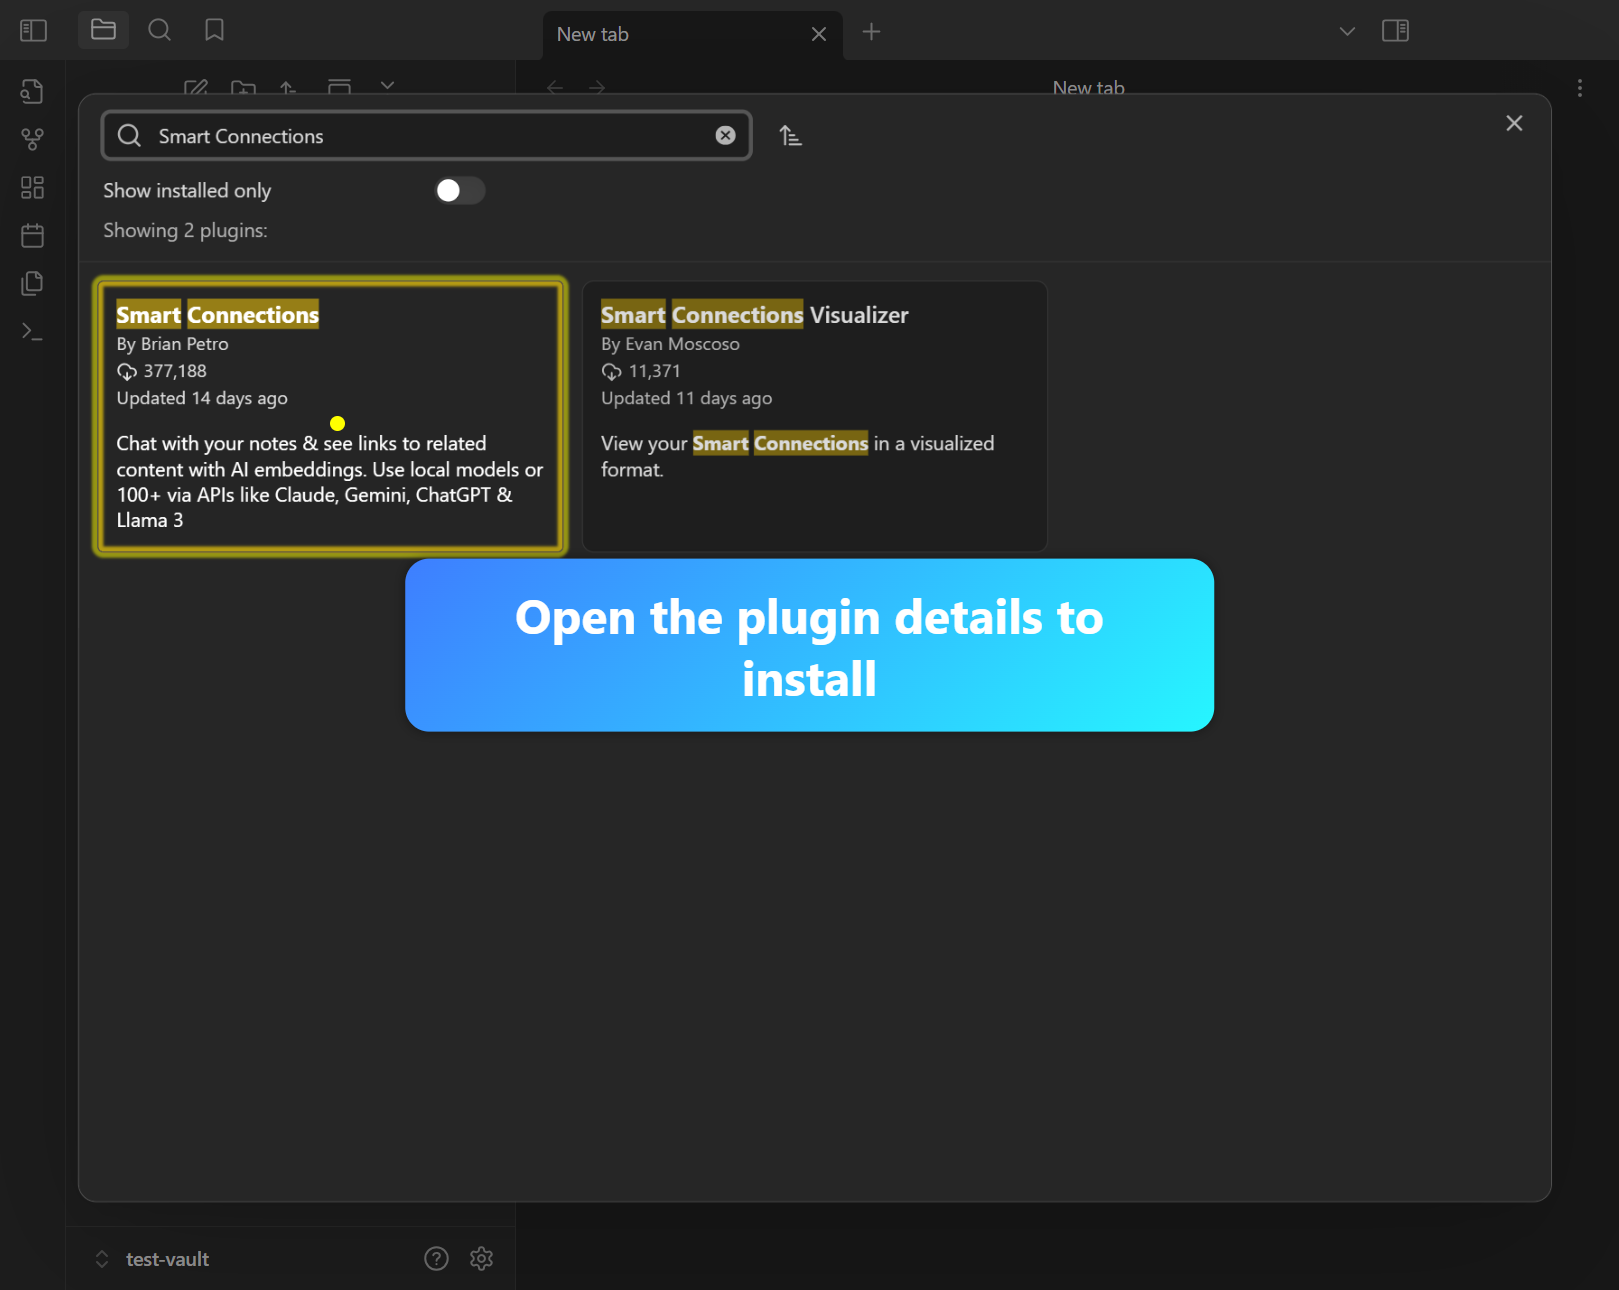
Go to Community Plugins and search for “Smart Connections.”
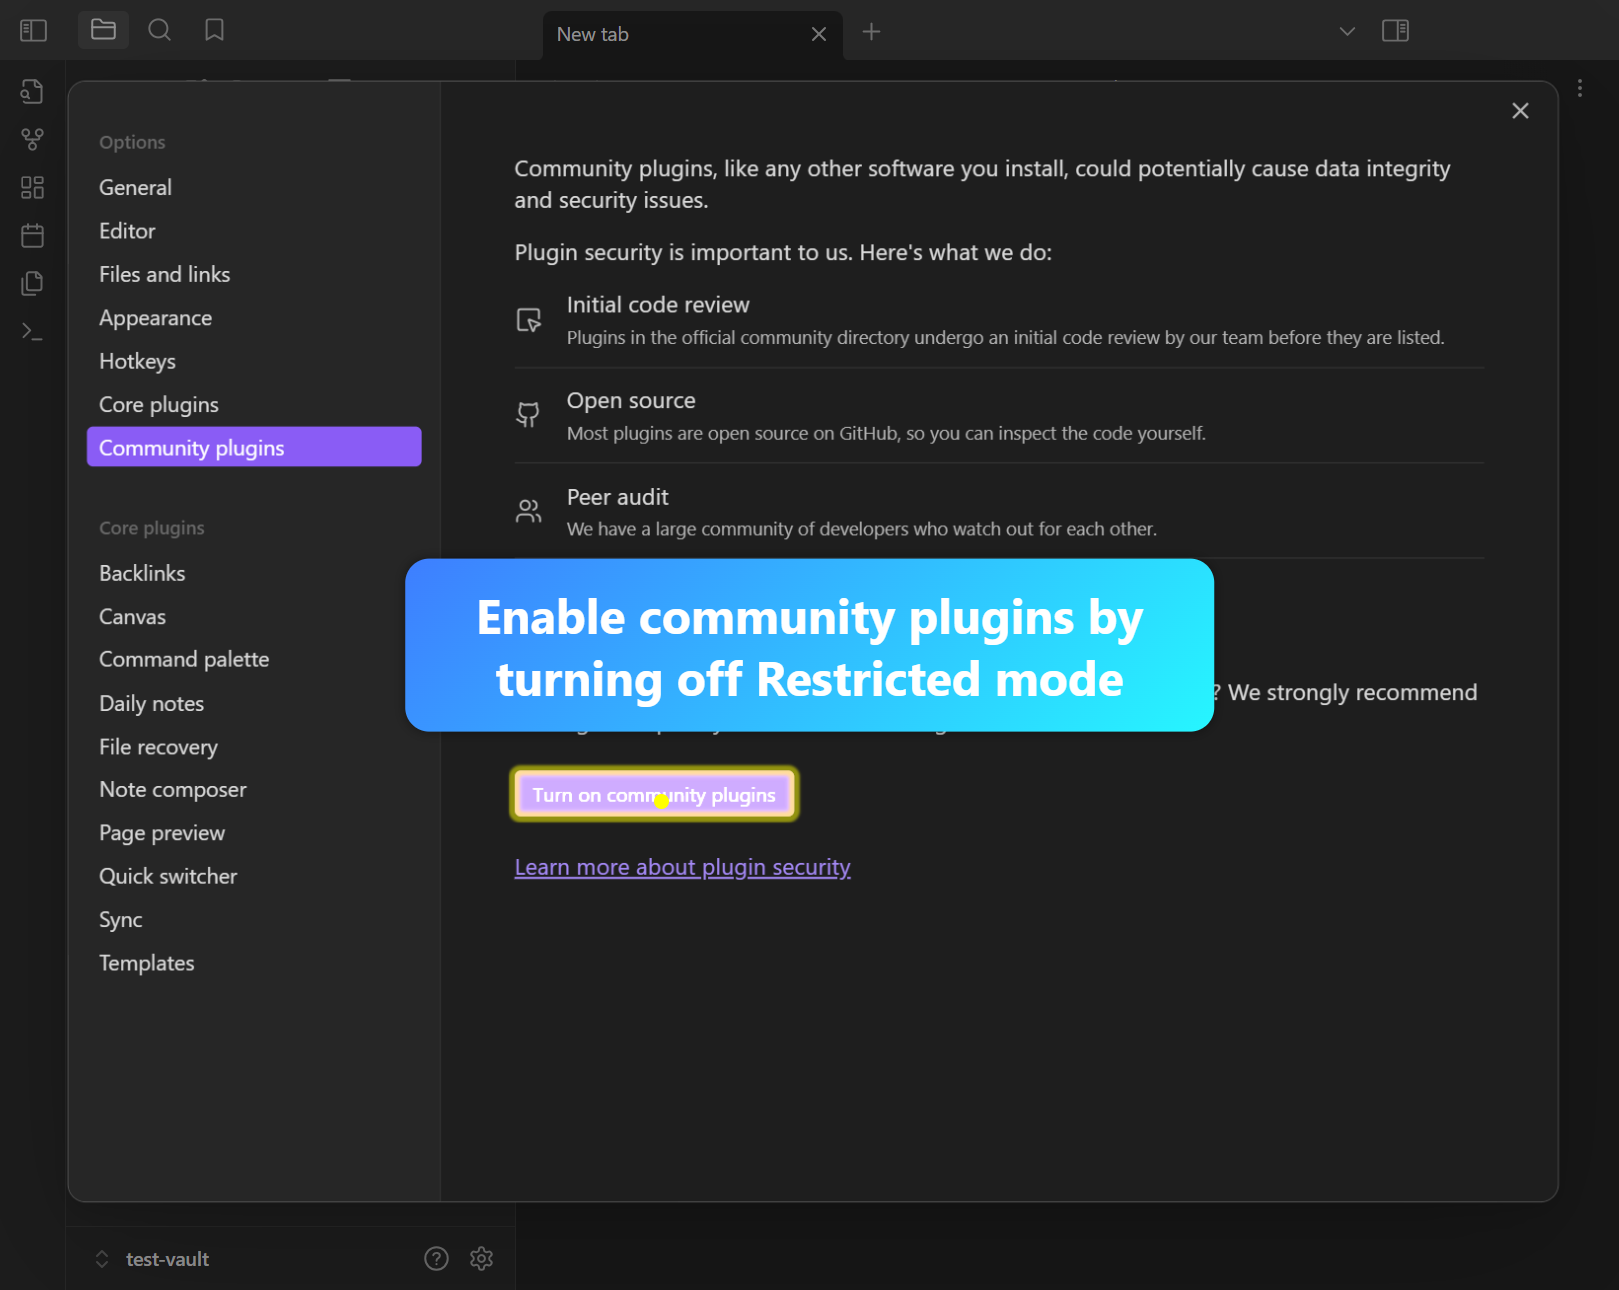
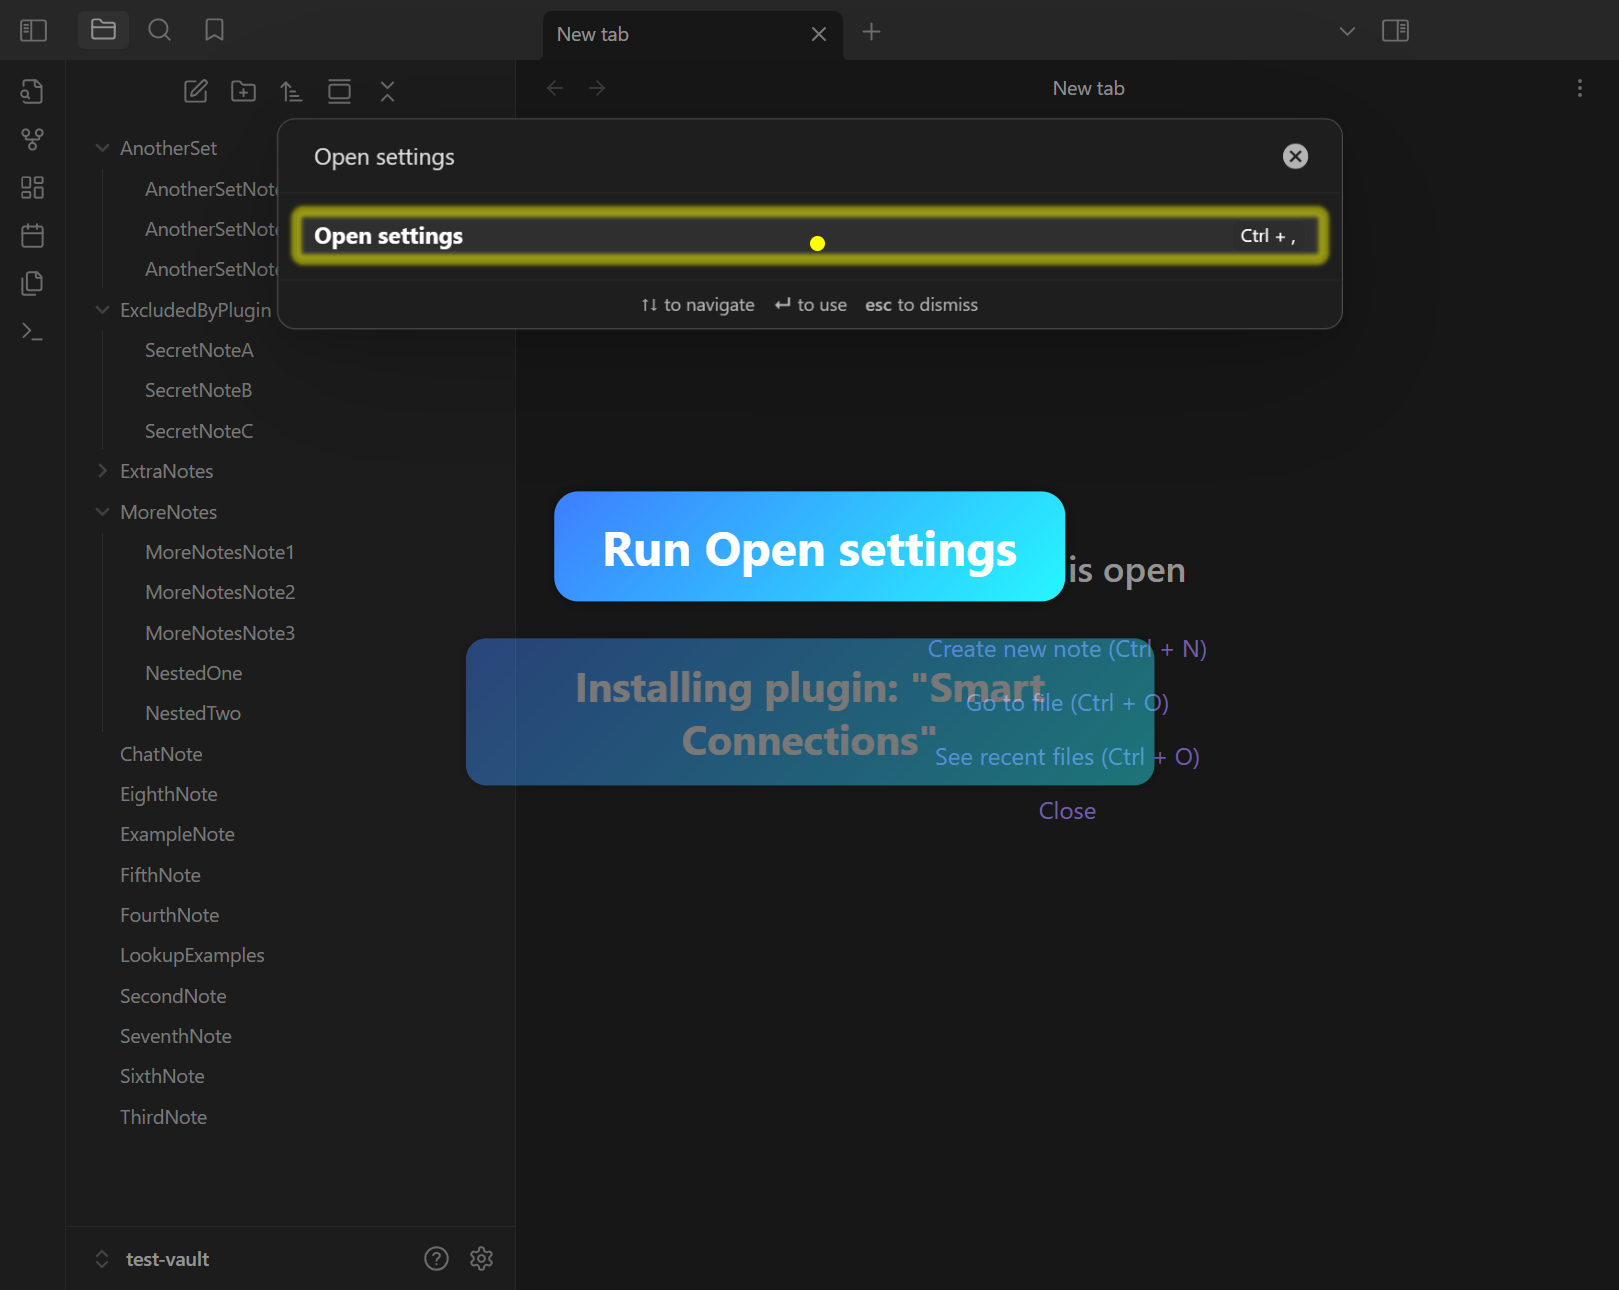
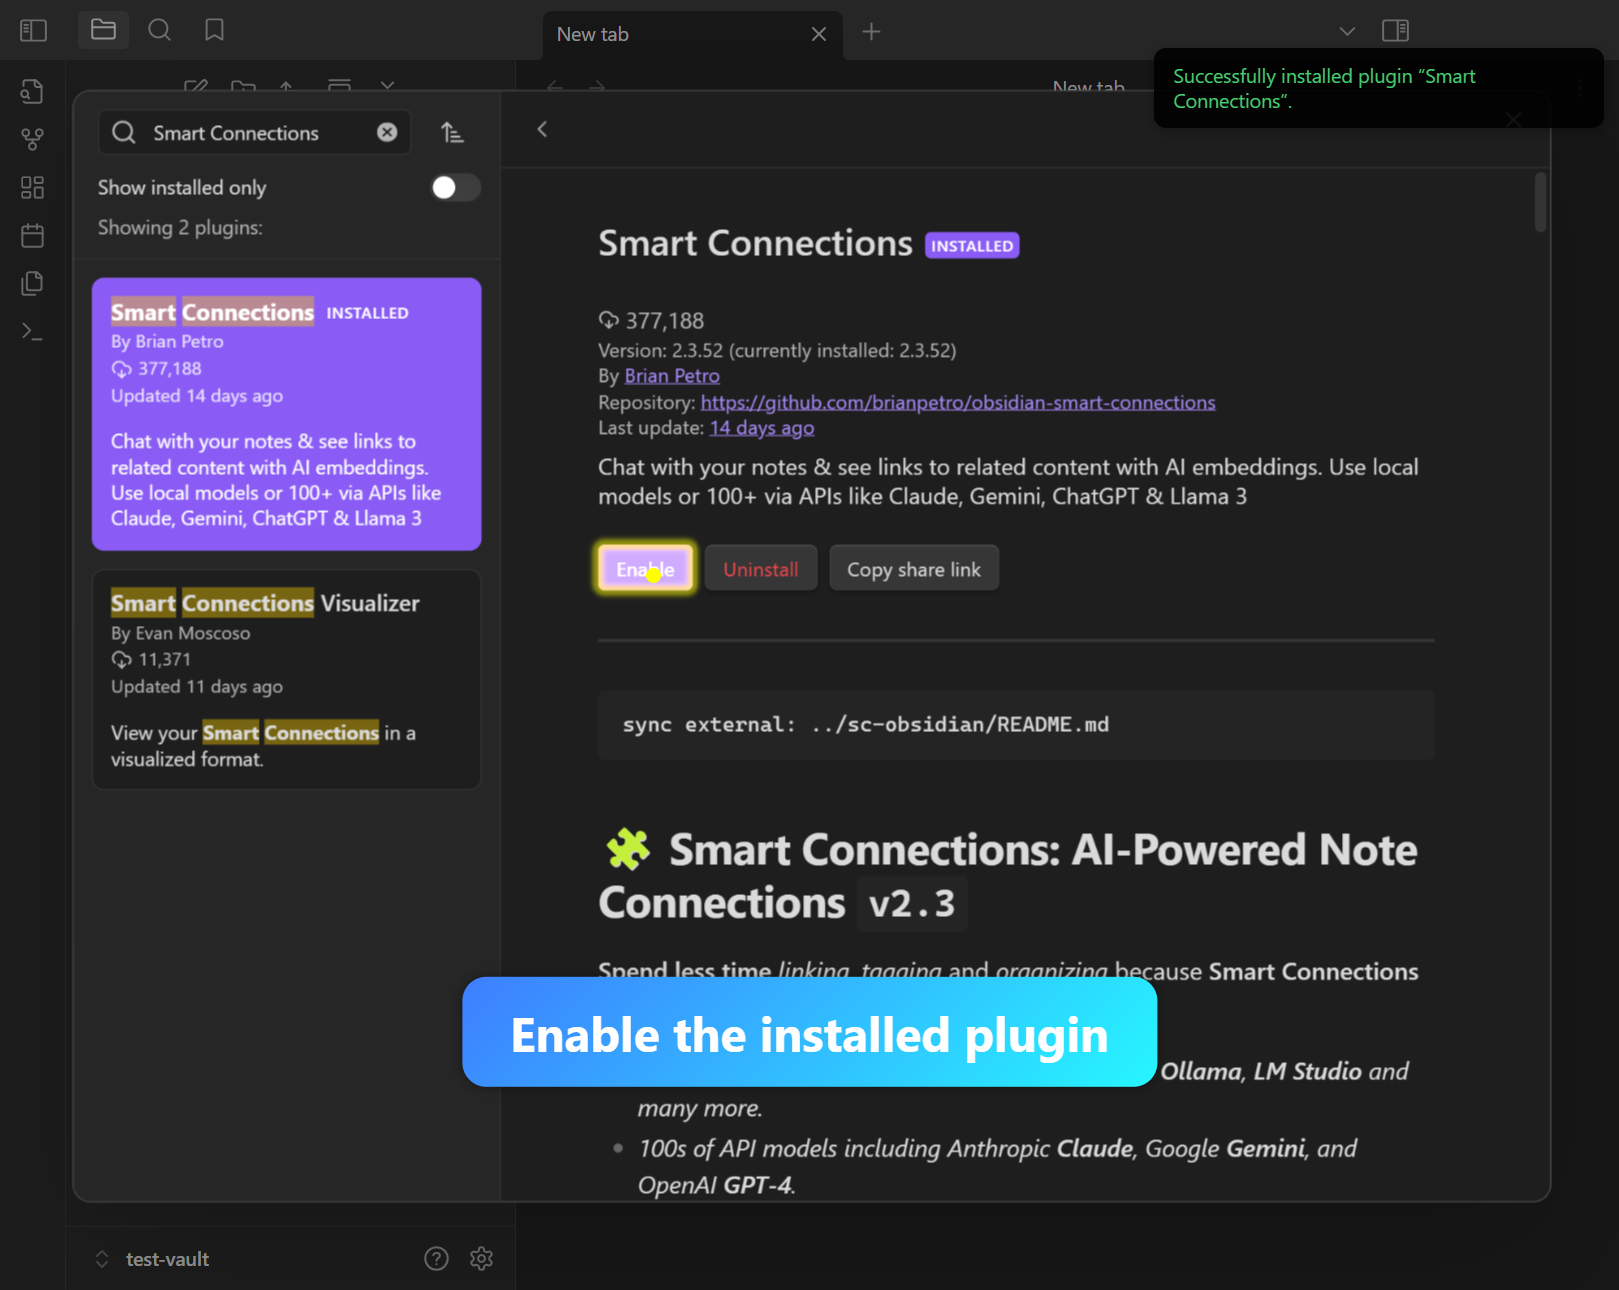
Step 3: Install and Enable
Install and enable the plugin, confirming installation success.

Step 4: Wait for “Embedding complete”
Obsidian may show a notification “Embedding complete” once indexing is finished.
Step 5: Check Ribbon Icon
Look for the Smart Connections icon in the ribbon for quick access.
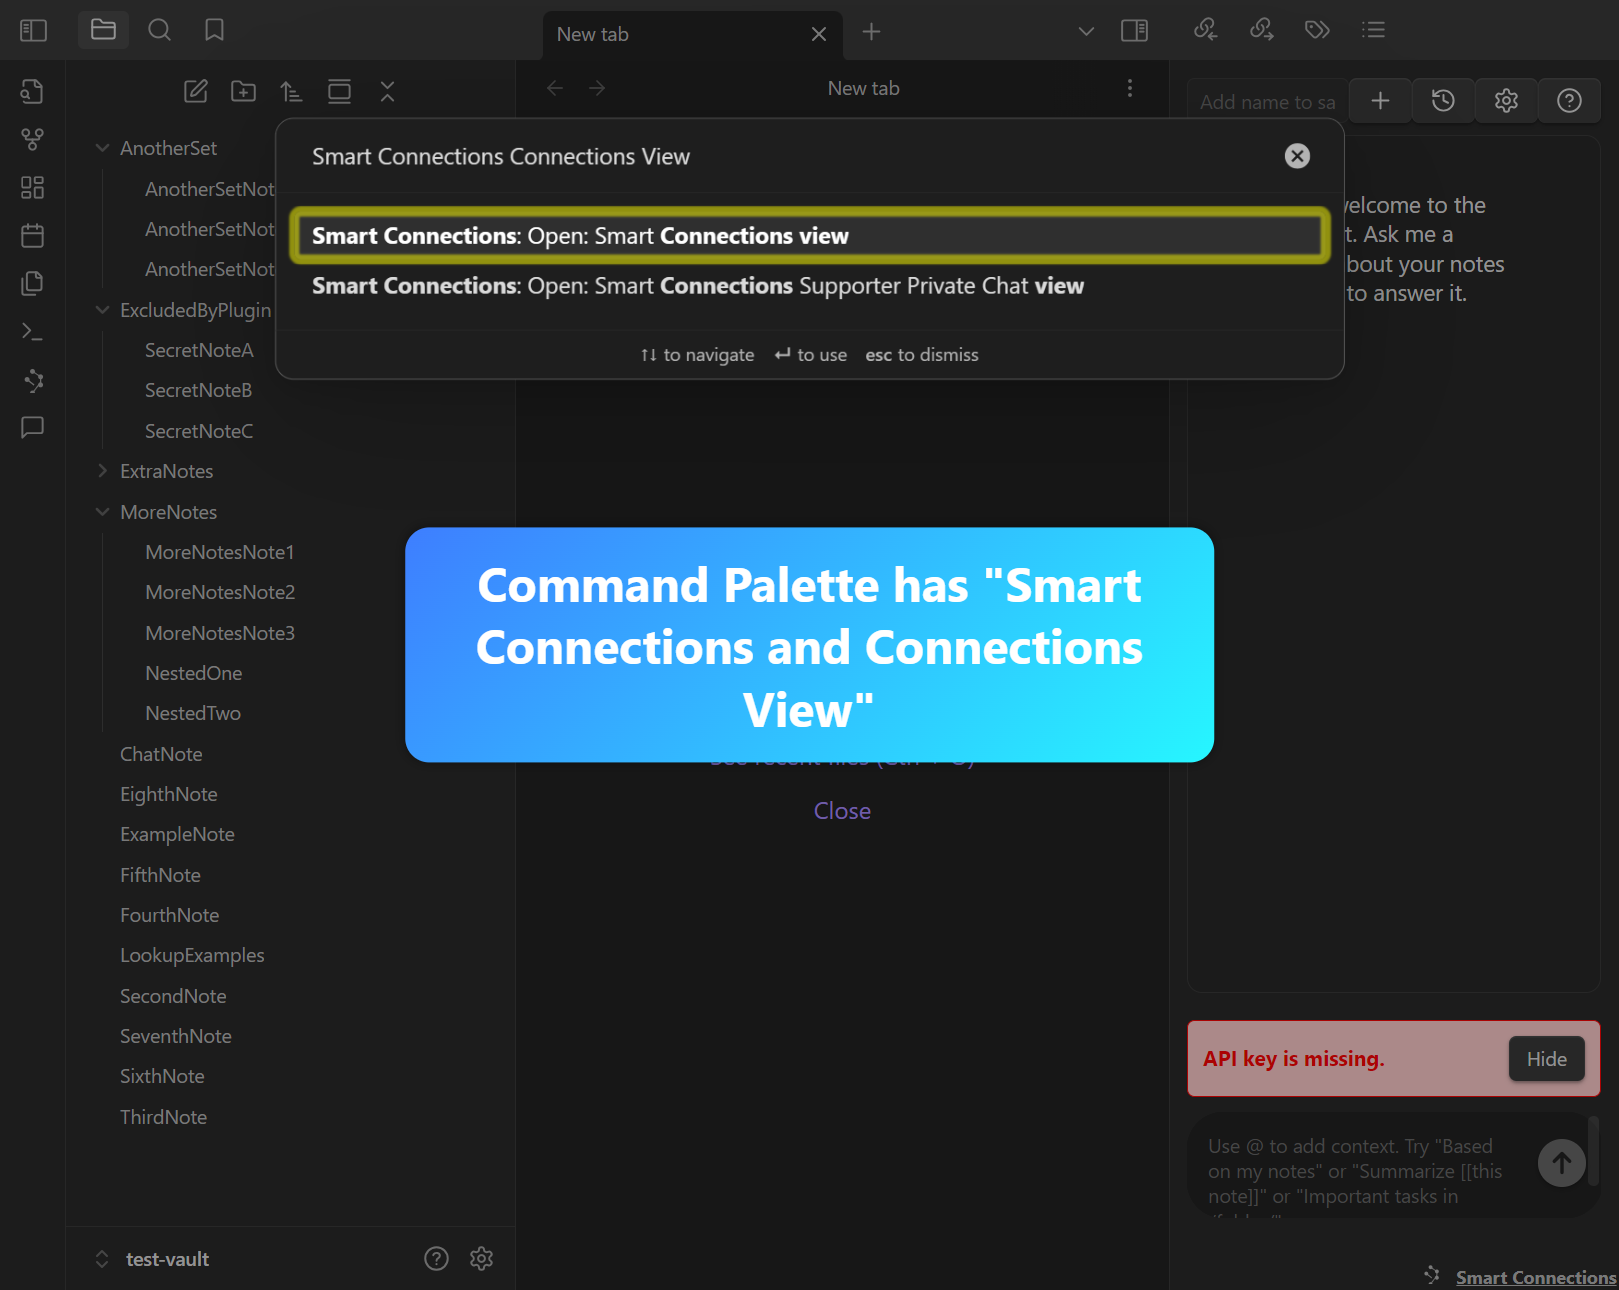
Step 6: Command Palette Verification
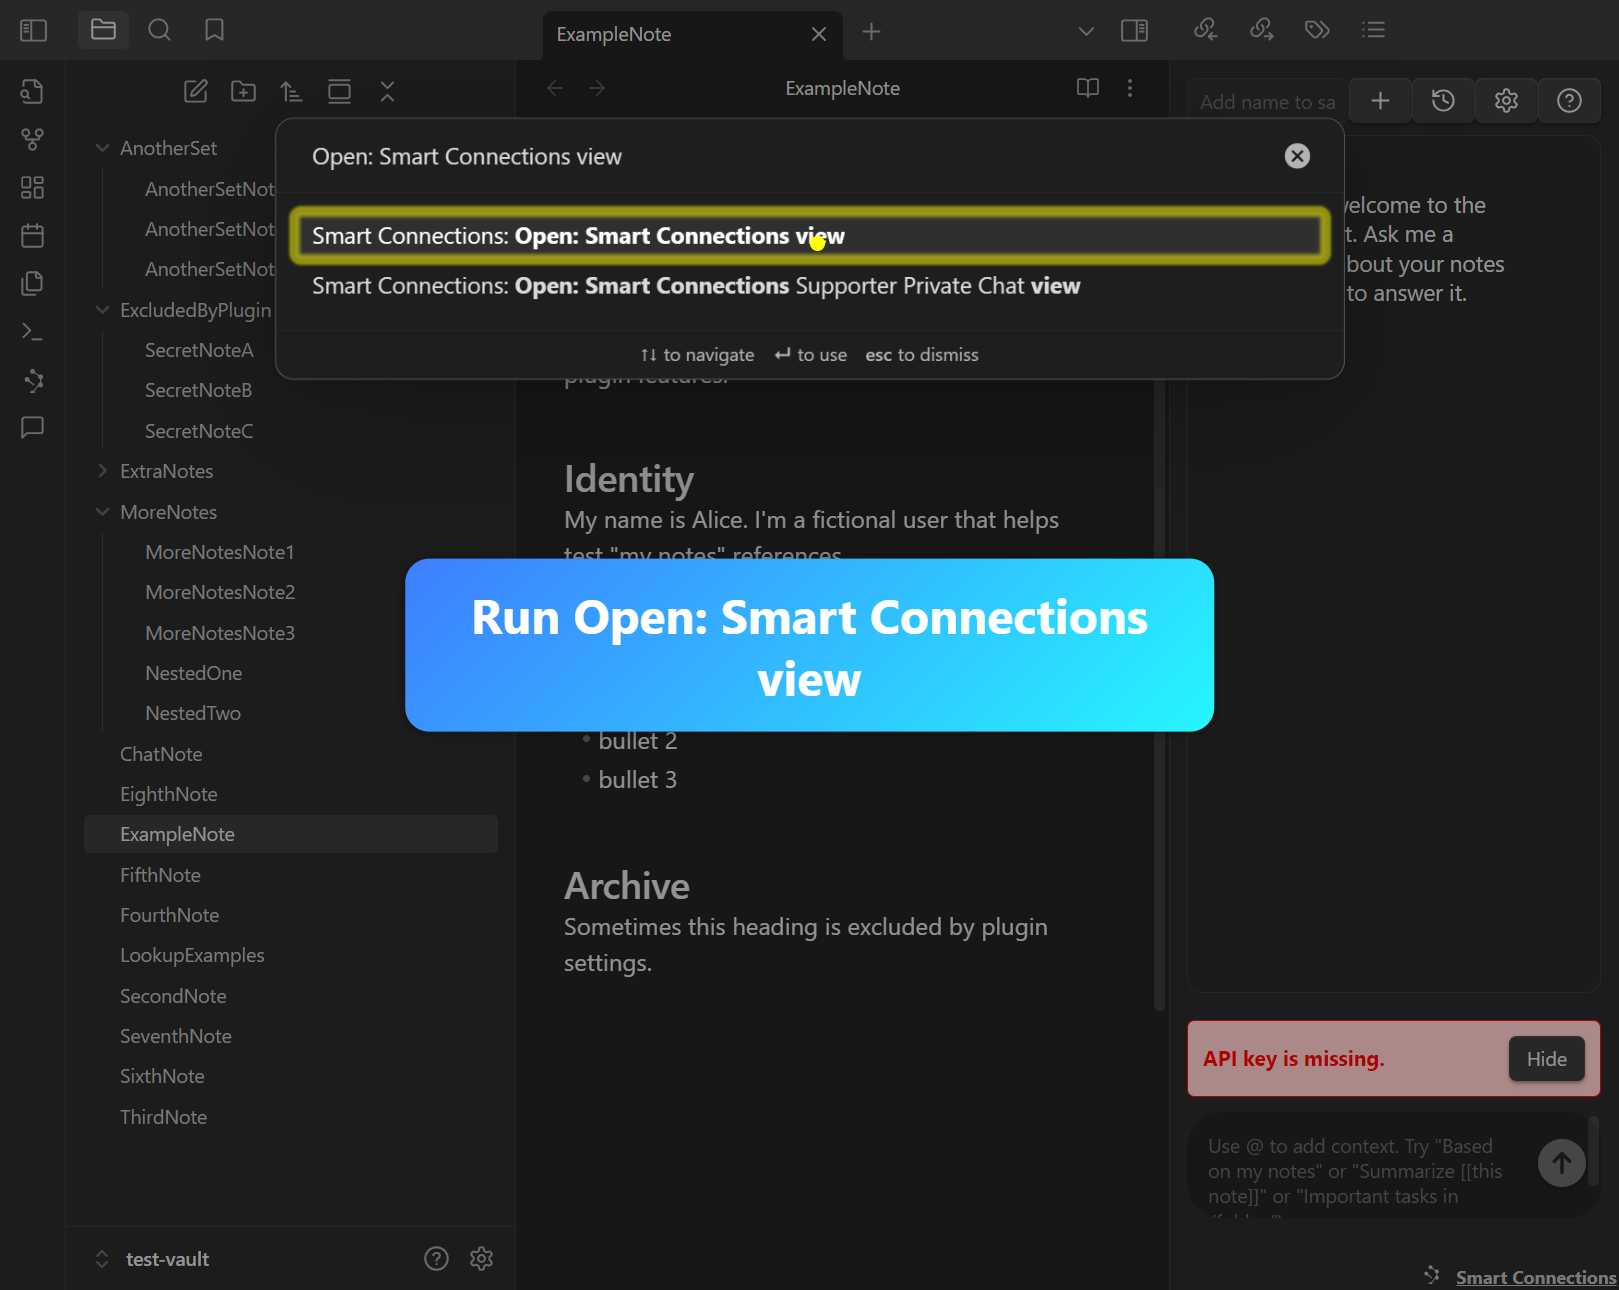
Open the Command Palette and confirm “Open: Smart Connections view” is listed.
Step 7: Open the Connections View
Run “Open: Smart Connections view” to confirm the pane appears and the plugin is active.